Monday, August 31, 2009


Friday, August 28, 2009
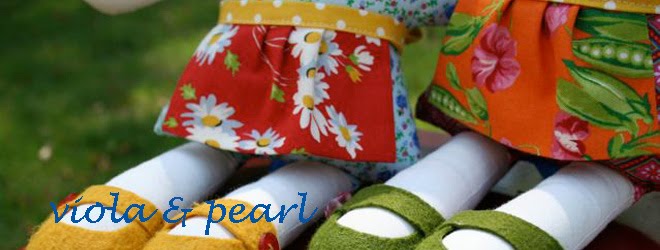
where I join the Princess and the Pea parade
I've spent the better part of the summer waffling between projects to make for two little sisters' birthday gifts. My complete inability to decide now means that one girl's gift is overdue by 3 months and the other's by a few weeks. (In my defense, I did have a baby in there somewhere, but still. Three months, people!)
Then I came across this great book by the talented Lauren Child and these two sets. What modern, fabric and fairy tale loving girl wouldn't be inspired? Plus, we're already huge fans of Ms. Child's work around here. And I've been obsessing over this fabric (so perfect for Audrey)since it came out, so the story's been on my mind. I couldn't resist this project.


 I made the mattresses pretty thin, with just one layer of lofty batting. I know how I feel when space-consuming toys come into my home, so I didn't want to make the set too large. There are twelve mattresses made from various calico prints. The bottom mattress has a little gathered pocket to hold the pea. 'Cause I know if it were my kids', that pea would disappear in about 7 minutes flat.
For the pea, I crocheted a small ball out of wool felt, then lightly felted it by hand. I can't find the pattern I used, but this tutorial would work just great, too, I'm sure. You might need to use a size smaller hook for a bit tighter gauge to get results like mine. For the felty look, I rolled it in my hands under VERY hot water for several minutes then plunged into cold water. Squeeze it out and let it dry. Done.

Then I came across this great book by the talented Lauren Child and these two sets. What modern, fabric and fairy tale loving girl wouldn't be inspired? Plus, we're already huge fans of Ms. Child's work around here. And I've been obsessing over this fabric (so perfect for Audrey)since it came out, so the story's been on my mind. I couldn't resist this project.


A few hours of stash raiding and totally, shamelessly copying someone else's clever idea produced this:

 I made the mattresses pretty thin, with just one layer of lofty batting. I know how I feel when space-consuming toys come into my home, so I didn't want to make the set too large. There are twelve mattresses made from various calico prints. The bottom mattress has a little gathered pocket to hold the pea. 'Cause I know if it were my kids', that pea would disappear in about 7 minutes flat.
 For the pea, I crocheted a small ball out of wool felt, then lightly felted it by hand. I can't find the pattern I used, but this tutorial would work just great, too, I'm sure. You might need to use a size smaller hook for a bit tighter gauge to get results like mine. For the felty look, I rolled it in my hands under VERY hot water for several minutes then plunged into cold water. Squeeze it out and let it dry. Done.
I also threw in two simple, sweet nightgowns to fit the dolls that I made for the girls last year, so they can be used as Princesses. (Hopefully these make up for the fact that I sent a joint gift this year...)
Wednesday, August 26, 2009
Superhero Cape
Like I said, amidst the diaper-changing, nursing, schooling and nose-wiping going on around here, I have managed to squeeze in some much needed craft therapy. This session came in the form of a birthday gift for a special boy.
 My kids spend the better part of every day dressing up and "playing pretend". A few weeks back, in the middle of an intense make-believe session, Gage realized that he couldn't be a proper superhero without the outfit to go with. And so, the cape request. It needs some embellishment, but considering that it was whipped out mere hours before his birthday party, I'm feeling pretty good.
 I kind of made it up as I went along, but this cape is very similar to the one here. I guess the main differences between my cape and the one in the tute are these:

This is the second year that Gage has requested a chocolate cake with green icing. Can do, buddy.


 And we just couldn't go home without more overpriced, cheaply made, plastic toys courtesy of Daddy, could we?
My kids spend the better part of every day dressing up and "playing pretend". A few weeks back, in the middle of an intense make-believe session, Gage realized that he couldn't be a proper superhero without the outfit to go with. And so, the cape request. It needs some embellishment, but considering that it was whipped out mere hours before his birthday party, I'm feeling pretty good. I kind of made it up as I went along, but this cape is very similar to the one here. I guess the main differences between my cape and the one in the tute are these: 1) I used a whole yard of fabric for mine (she gets two smaller capes out of one yard),
2) I bound the edges with double fold bias tape instead of serging them (too lazy to change out the thread in my serger), and
3) I attached a full, wool felt collar to this one that would stand up in the back. I think that gives it a little more dramatic flair, don't you? Plus it attaches in front with Velcro, thereby eliminating the need for Mama to tie it on every time he decides he wants to be a Super.
Oh, and I used my favorite freezer paper applique trick for the "G". It's a pretty simple technique. First, I got my wool felt piece ready by attaching iron-on fusible webbing to one side, leaving the backing paper attached. Set that aside. Next, I printed the "G" on my printer in the size and font I wanted, then traced it onto plastic-coated freezer paper, plastic coating down. (These steps could probably be consolidated, if I just printed directly onto the non-plastic side of my freezer paper. Thoughts?)
Okay, so next, I ironed the freezer paper, again with the plastic side down, onto the unfused side of my wool felt, then cut the "G" out of the paper, felt and fusible webbing all at the same time. Peeled the fusible webbing backing off the bottom and the freezer paper off the top and Bam! A perfect "G" patch ready to be ironed on and stitched down. I just used a simple straight stitch around the edges, but, of course, you could use any stitch you like. Or, if you used No-Sew, you could believe the Heat'n'Bond folks when they say you don't have to stitch it down. That's never worked well for me, though. Especially for kids' stuff that will probably need frequent washing.
Gage wasn't the only birthday kid on my list. More birthday posts to come once I'm sure they've been received.
And, for more fun with freezer paper, click here...
Or, enjoy some random birthday weekend pics:

This is the second year that Gage has requested a chocolate cake with green icing. Can do, buddy.


 And we just couldn't go home without more overpriced, cheaply made, plastic toys courtesy of Daddy, could we?
Monday, August 24, 2009
Done.

photo by Amy
I'm still here! And I've actually been accomplishing some crafting lately. Like this quilt. It's finally finished, completely hand tied and hand bound. Which I know probably sounds pretty simple to some of you, but was quite an accomplishment for me, what with the recent changes around here. Once I figured out how to work this thing to my handsewing advantage, it was all good.
You can see that her bed is red, with a pink Jenny Lind changing-table-turned-night-table-slash-storage-shelf. Plus there's a Somerset Gold dresser in the room. I'm about about eclectic, use-what-you-have decorating, hence the quilt's pink, red and yellow color scheme. It all pulls together quite nicely, if I do say so myself.
Subscribe to:
Posts (Atom)